Omikron: The Nomad Soul: Walk Through / Hints and Tips

Nomad Soul

PC and Sega Dreamcast

Hints & Tips:

If you don't want to use the walk thru' here are a few tips on playing the game.

1. Save & Advice: To save the game you need 1 Magic Ring, to get advice on what to do you need 3 Magic Rings. Save game before buying advice, that way after you buy the advice, write it down then exit the game. Reload your saved game and you will still have the 3 Magic Rings.

2. Increase Fighting Skills: At Kay'l's Apartment keep training til you advance to a Grand Master of Tarr. Each time you become someone new you'll have to train all over again so find a training room.

3. For PC Players: It's best to use a gamepad when playing the game. On the shooting levels use the gamepad to guide your character and use the mouse to point and shoot.


Boz Omikron: The Nomad Soul - Hint, Cheat, Walk Through: (Author unknown).

Part One: Anekbah (Beginning)

Exiting the Alley

Before moving, acquaint yourself with your Sneak. Whenever you access the Sneak, you will immediately go to the inventory screen. At this point, you'll have two items listed: Kay'l's Apartment Key and an MK400 Notice. Examine each. After you've examined the items in your inventory, find the passageway out of the alleyway; on-screen instructions will lead you in the right direction. Watch closely for an object, a magic ring, on the ground. Pick it up by pressing Action and put it into your inventory by pressing Action again. You emerge on a dark and rainy street corner in the city of Omikron in a section known as "Anekbah." As you leave the alley, the credits roll.

Finding Kay'l's Apartment

Consult your Sneak and summon your vehicle. Highlight the green C-shaped icon on the stack to the left and select Kay'l's apartment from the list on the right. Approach the Slider and press Action to open the door and climb in. The Slider will drive you to your destination automatically. Go through the large door and enter any of the three lifts. Face the control panel and access your Sneak. Select the apartment key and Use it. Ride the elevator upstairs to the apartment. The apartment has several rooms and areas, all of which must be explored now. To your left is a desk; ahead is the living room. Along the wall on the opposite side of the room are the bedroom, a training room, and a kitchen. Turn left to find Kay'l's desk. Rifle through it to find 500 Seteks.

Descend into the conversation pit for a document called a Ring Note. Inspect the terrarium opposite the door. Inside, a lizard named "Koopy" paces in front of a small, metal key hanging from a wooden perch. Turn right and go through the door to the kitchen. Turn right and left to a cabinet on the side of the room's central pillar: it contains a can of Kloops Beer and a bowl of PurÚed Cramen. As you round the corner of the kitchen, you spy a trio of Rings floating in the air. Remember what the Ring Note said. You must have Magic Rings in your possession to use the Save or Advice command. In the cabinet on the other side of the central pillar, pocket a can of Koopy Food. Return to the living room. As you come out of the kitchen, a woman with a gun greets you; her name is Telis. Quickly dawning recognition, however, causes her to drop the weapon and run to embrace you. Engage her in conversation any way you please to find out some critical information. As Telis heads to the bedroom, pick up her dropped weapon, a small Waver Gun. Approach the food tray on the terrarium and Use the Koopy Food.

The happy and well-fed pet performs its only trick: it brings you the small key on the perch. Pocket Kay'l's Small Key and proceed to the bedroom. The armoire on the wall opposite the door houses Kay'l's Police Badge and a Large Medikit. The chest along the next wall contains a Sleeping Pill Prescription. Go through the door in your bedroom to the training room. To practice your hand-to-hand fighting skills, approach the terminal that lowers from the ceiling. Select a skill level and proceed to fight the computer-generated foe. Once you see messages saying that you have reached your top potential in both Attacking and Dodging, you've finished your initial training.

Before you leave, visit the Multiplan terminal and read the Multiplan Notice. Leave the apartment via the elevator, return to the street, and Examine Kay'l's Police Badge to add the address of the Security HQ to your Slider interface. Summon your Slider and point it toward Security Headquarters.

Getting the Sleeping Drug

The Slider dumps you off in front of the Security Headquarters, but you've an errand to run first. Turn around and carefully cross the street to the Drug Store via the entrance on the street side. The Drug Store is one of several shops you will visit for supplies. In this case, you'll come here for Medikits of all sizes and prices. That's not, however, why you're here now. Approach the counter and Use the Sleeping Pill Prescription. The attendant returns with a bottle of pills; be sure to pick it up before you leave. As you leave the drugstore, chat with some of the folks sitting on the benches nearby. Some will refuse to talk to you, but others will be more forthcoming. You'll glean some useful information about the society in which you find yourself. Make a habit of doing this whenever you see citizens at rest on benches.

Security Headquarters

The Slider dumps you off in front of the Security Headquarters, but you've an errand to run first. Turn around and carefully cross the street to the Drug Store via the entrance on the street side. The Drug Store is one of several shops you will visit for supplies. In this case, you'll come here for Medikits of all sizes and prices. That's not, however, why you're here now. Cross the street again to Security Headquarters.

Pass through the first set of doors and Use Kay'l's Police Badge to open the second, locked door. Walk right by the Mecaguard stationed at the elevator stack and go either left or right to an elevator. Step inside as the door opens and wait for Kay'l to turn around to face the door. Press Action to see the elevator's control panel to learn the floor layout. Start with the Agent Offices on Level 1. Find the green door and go visit Kay'l's friend, Tarek. You will discover important information in your conversation with him. Go through the blue door to meet Agent Boog of Internal Affairs. Enter the yellow door to check out the Break Room. Pick up the memo on the table. Go to the vending machine. Use these machines to buy food items that can enhance your Energy level and buy a cup of Koil. Go back to the elevator and go to Level 2. Look first for the orange door. Enter to find an empty office. Swipe the flyer on the desk and open the cabinet to find a Suspicious-Looking Droot Salad. Finally, rifle through the desk drawers for a Magic Ring. Approach the control box by the blue door to Kay'l's office and Use his badge to gain access. Three Rings float in the corner. Start by opening the cabinet to the right of the desk. The wooden box here is locked; Use Kay'l's Small Key on it to crack it open. Inside you find an Ancient Scroll. In the drawer on the right side of the desk, swipe one hundred Seteks. Boot up the computer to access Kay'l's dossiers. Return to the hall. Check out Den's door. It's locked. Go to the yellow door to have a chat with Sork. As you head back to the elevator, you will be summoned to Captain Lea's office.

Descend to Level 4 and find the green door. Walk by the guards and the hulking Meca and meet with Kay'l's boss. The meeting does not go well, but you gain some disturbing insight. Captain Lea gives you a new assignment in the interim. You are to interrogate a prisoner and report your findings to her. She presents you with three items: Mission Order Jenna 712, Jenna 712 Detention Dossier, and Jenna's Apartment Key. Be sure to pick them all up before you leave the office. Go briefly to your office before departing to take care of business.

The Jenna Matter

Return to the street and summon your Slider to take you to Jenna's apartment. Enter the building and Use her key on one of the elevators. Poke around Jenna's living room to find a Chokovat bar and an informative copy of the "Omikron News." Inspect the bedroom. All you find is a locked closet. The two doors in the corner lead to the shower and the toilet. Approach the toilet bowl and press Action to reluctantly search it. You find Jenna's Small Key.

This key opens the closet in Jenna's bedroom. Return to the bedroom and approach the right side of the locked closet. Use Jenna's Small Key and the closet opens, revealing twenty Seteks, a Large Medikit, and Jenna's Note. Go back to the living room and check out the lights on the wall. Press Action to find a secret switch and press Action again to activate the switch. A wall panel raises, unveiling a Decagun and a Propaganda Document. Leave the apartment and return to HQ. Take the elevator to the Detention Cells on Level 3. Enter the red door and pause to pick up the Virtual Training Center Ad before chatting with the guard. Chat with the Detention Guard who asks for your orders and the guard will lead you to the prisoner. Follow him to the fourth cell on the right. Enter and speak to Jenna. Jenna seems innocent enough. You conversation with her will reveal a few things about her. Finally, she asks you if you think she's guilty. No matter what you think, tell her you think she's innocent. Take a right as you leave Jenna's cell and note a set of Rings.

As you leave the Detention Cells, Telis calls to you to go to lunch. No matter what you say, she talks you into it. You're to meet her at a restaurant on Tahira Street. She'll wait, so take care of a few things first.


Part Two: The Lunch Time Rush.

The Archives


There are two ways to get into the Archives: an easy way and a hard way. The easy way will save you some time. Go to Captain Lea's office and give her your report. Before you leave, she asks you to get her a cup of Koil. Access your Sneak and Use the Sleeping Drug on the cup of Koil you purchased earlier. Give the tainted cup to her by Using it. You watch as the drug takes effect instantly and Captain Lea face-plants on the desk. Pilfer one of the cabinets for a Koopy Sandwich. The captain's desk drawer holds twenty Seteks and Captain Lea's Police Badge. Bid her adieu and prepare to access the Archives. Proceed now to Level 3 and the Archive Room. You find yourself in the Archive antechamber. If you got to this point the easy way, the door on the right will be locked and a Mecaguard will man it. Go to the card reader to the left of the door and Use Captain Lea's Police Badge to enter the Archive Room itself. Approach the terminal in the middle of the room and press Action to take a seat. You will have four dossiers available to you.

*Note: It is suggested that you go to Kay'l's apartment and use the holo fighter until you are proficient at fighting*

Lunch with Telis Leave Security HQ and call your Slider for the trip to lunch with Telis. Before going inside, however, walk north from the front door and turn the corner to meet a beggar. Give him a small sum and he gives you a message. When you find a Life Potion, bring it to this poor wretch. Just as you are about to tell Telis the weird story of your soul transfer, you get a call summoning you to a holdup at a supermarket at 816 Zodir Street. There are reportedly eight armed robbers and possible hostages. Duty calls. As you turn to go, Telis gives you her Talisman for protection. Take it and call your Slider to go to the market.

Supermarket Holdup

Enter the supermarket. As you cross the second door, you witness an armed, masked man beating a hostage. Be ready to enter Shooting Mode as the scene ends. Trudge north toward the other side of the store. Near the corner, you'll contend with three or four robbers. Turn right at the far northwestern end of the room and then right again to face south. Pick off the two gunners sniping from behind the burning yellow boxes ahead. Approach the boxes and turn left. Advance slowly as a robber bursts through the boxes on the right. Go through the hole made by this ambush and turn west. Note the Small Medikit to the west. Continue south to the end of the store. Look north from the Large Medikit and take the first right. As you walk carefully east, two more robbers burst into your range. Turn north carefully. Note the Medium Medikit to your left. Move into the open area to the north and position yourself in the northeast corner, facing west. Switch to the Decagun if you have it and inch west until another robber pops up from behind some boxes. Kill him quickly to avoid his shower of rapid fire. When this final enemy expires, the surviving hostage informs you of another robber through the door in the northeast corner. Go downstairs where a man attacks you. Hand-to-hand combat ensues. When you've beaten him down, search the room for a Mana Potion.

The Morgue

Enter the Morgue and approach the receptionist/nurse. A vision assaults you as you enter. Kay'l asks to see Meditech Yudin, the coroner listed in his computer files, and the receptionist directs him to the crematorium through the left-hand door. Next to the roaring oven, you find Meditech Yudin. Questioning reveals some grisly details. Yudin invites you to view the most recent body. You may now return to the lobby and access the right-hand door. Enter the first door on the right. Inspect the male body by the door. Pick up the Surgical Instrument resting near his shoulder. Check out the female body; it's Maya, the most recent victim mentioned in Kay'l's report. She is also the one you saw in the vision as you entered. Press Action as you stand next to Maya to inspect her body. Use the Surgical Tool on Maya. Pick up what you find by pressing Action. You see something strange under Maya's fingernails. You'll need to find somewhere to analyze this strange sample. Once it's analyzed, you can deposit it.

Swipe the Large and Small Medikits on the shelves and return to the hallway. Enter the next door on the right. Approach the computer terminal attached to the "meat lockers." Find Den's body on the menu and summon it by selecting its number. When Den is delivered for inspection, approach him and press Action. His damaged Sneak sits beside him. Pocket the Sneak for later analysis. As you leave Den, walking toward the terminal at the end of the room, you see another vision. Use the Corpse Sample on the analyzer. Return to the hall. There's a set of Rings here. Return to Security HQ. Go to Tarek's office. When you engage him in conversation, Kay'l gives him Den's Sneak and asks him where he could get it fixed. Tarek recommends a man named Fu-An who keeps a shop somewhere in Qalisar.

Arresting Loeta'r

There's one last bit of business to take care of before venturing into Qalisar. Take your Slider to the bar in Zone 42 to arrest the counterfeit Sneak runner Loeta'r. Enter the bar, but be ready for a fight. Your conversation with Loeta'r, the bartender, quickly dissolves into a gunfight. Clear the room and head into the bathroom to finish off Loeta'r's last flunky. Go into the stall he came out of to swipe his 1000 Seteks, ten Magic Rings, and Octagun ammo.


Part Three: The Red Light District.

Looking for Anissa


Enter Qalisar. As you emerge from the western gate, turn left to see a set of Rings and a ramp leading to an upper level. Scale the ramp. Look for Kat's Bar to the left. Peek inside for a drink and ask around for the elusive Anissa. All you get is a blank stare. Leave the bar and continue down the boulevard until another storefront appears on your left. The Peep Show is the last known address of Anissa. The employee at the Peep Show knows Anissa. He says she hasn't worked there in a while, but he's heard she's at one of the bars on Qalisar Boulevard. He invites you to look around. Around the back, you'll meet a call girl. You can't hire her, but you can become her when you gain reincarnation ability; she's Lahyli'n, one of Qalisar's three inhabitable characters. Leave the Peep Show and cross the bridge to the other side. Head into Aka's Bar. Turn right as you enter the bar and note the set of Rings on the end of the balcony. First, however, you experience another vision. At the base of the stairs, look for a document on a nearby table. Pick up the Omikron Central Bank Ad. Another table sports a full Double Yuki. Go chat up the bartender about Anissa. He's a bit stubborn; refuse his offers for a drink and insist on getting an answer to your question. The bartender points out the dancer in black as Anissa.

When you've finished with the bartender, you'll see Anissa come off her platform for her break. Walk over to the exhausted dancer and ask her about the murder she witnessed. She'll tell you to follow her into the back rooms. Once in the back hallway, begin your conversation again. You glean some engaging information from this chat. She goes to her dressing room to change and get the paper. As the door closes, you hear a scream. Position yourself by the door control box and Use your Waver Gun to shoot the lock open. Kay'l rushes inside only to find Anissa dead. As he goes in, another figure rushes out of the room. He's wearing an Omikron Police Uniform. Search Anissa's body to find a small key. Approach the table on the wall and press Action near the bent black ornament sitting on top. This opens a wall safe to the left. The trunk inside of the safe is locked. Fortunately, you have the key. The trunk contains the note Anissa told you about. Finally, open Anissa's cabinet to find a Medium Medikit and Den's Card. Slip out of the bar and back outside.

The Sha'armet Tournament

As you may recall from the flyer you found in Security HQ, Qalisar is home to a lucrative but dangerous fighting tournament called the Sha'armet. You are about to stumble upon it. Turn left as you come out of the Aka's Bar and look on your left for the Xam Store. Enter this innocent-looking shop, taking notice of the Rings in the corner. Approach the shopkeeper and ask to look at his list of wares. You may buy any item you want, but there's one that will get you into the fighting tournament. Purchase a Meca-Lamp battery and the shopkeeper will discreetly open the gate to the back room. Take the elevator down and boost your Energy to maximum with whatever Medikits you have. You'll need all you can get.

To win the whole shebang, you must defeat five opponents. Each win gets you a prize of increasing value. If you defeat all five, you'll leave Fighting Mode and may exit the arena the way you came. When your Energy level reaches ten, you are ejected from the tournament with a parting gift of whatever you won to date plus a piddling twenty Seteks. Buy some Medikits with the proceeds and nurse yourself back to health.

Shopping in Qalisar

Turn right as you leave the Xam Store and walk past Aka's Bar. The next door is the Sex Shop. Go in and buy a poster for your friend Boog. Turn right as you leave the Sex Shop. The next bar on your right is Harvey's Bar. Go in and head to the bathroom. Waiting for a stall is Dakme't, the other of Qalisar's inhabitable characters. Leave Harvey's and turn right. Take a long walk until you find Fu-An's Shop. Talk to Fu-An. For 400 Seteks, he will extract whatever items he can from Den's broken Sneak. Pay it and, in return, you get Den's Police Badge.

Visiting the Temple

Leave Fu-An's Shop and descend to street level. Follow the road to the northeast to the Abandoned Temple. As you enter, watch the walls on the right side for two Magic Rings. Stand on the star in the middle of the temple with your back to the door. Remember the note you found in Kay'l's cabinet at work: with your back to the door, walk ten steps forward, turn right, and take ten more steps. You should be facing the wall of the temple with a wooden beam propped to your left. Push Action while facing the wall and a hole will open in the floor to your right. In the hatch, you'll find a Reincarnation Spell and Jafa'yl's Parchment. Leave the temple and summon your Slider. Select Security HQ to return to Anekbah.


Part Four: Back to Anekbah

Raiding the Security HQ


Enter Kay'l's workplace again and head straight for Boog's office. Engage Boog in conversation and present him with his gift: the Erotic Poster. As a token of his gratitude, Boog gives you something even more valuable: a Security HQ Master Key. Next, go to Den's office and Use his badge to unlock the door. Open Den's cabinet to find a Memo and a Scrawled Note. Rifle through Den's drawers for Den's Apartment Key.

A Cry for Help

As you leave HQ to go to Den's apartment, you receive an urgent call on your Sneak from a beaten and bloodied Telis. She needs you at Kay'l's apartment immediately. Hop in your Slider and get over there. As you enter the apartment, notice a piece of paper on the floor. Pick it up and read Telis's Message. Jump back in the elevator and head to the roof; you'll go there automatically when you activate the lift. Up on the roof, you find a beaten Telis kneeling at the far end of the roof. Approach her. She tells you that a demon came to the apartment looking for you. It wanted your soul. She was scared, but now all she wants is for you to hold her. Be wary as that's not Telis after all. As you watch, Kay'l's wife transforms into a skittering, vicious demon. Do battle with the she-demon to the death. If you lose the fight, you will be left for dead on the roof.

Luckily, Syao, a nimble thief, happens upon your lifeless form. Your soul transfers to her body along with all of your belongings. If you win the fight, you may collect five Magic Rings and proceed, still housed inside Kay'l. No matter which body you inhabit, go to the elevator. As you step inside, you are stopped by an apparition who has much to tell you. She looks vaguely familiar. You receive some disquieting knowledge.

Den's Apartment

Descend to the street and catch a Slider to Den's apartment. Enter the building and Use Den's Apartment Key in the elevator. Den's apartment is laid out much like Kay'l's. Look around the living room, taking note of the white tiger statue by the door. Note also the Transcan terminal and the tiger portrait near the bedroom door. Enter the bedroom and have a look around. Note that the layout is again similar to Kay'l's home. Approach the night table and pick up the wedding picture. Notice the Rings in the corner and approach the armoire on the wall. Snag the Double Waver Ammo. Next hit the showers and pick up Den's Small Key. It's in the corner, so you'll have to look carefully. Exit the shower and pick up the newspaper on the bed. Use Den's Small Key on the chest. Gather up Mana Potion +35, a Large Medikit, and 200 Seteks. Return to the living room.

Recall the note you found in Den's office. Approach the tiger statue and press Action to push it out of the way and expose a button; push it to open the tiger picture on the other side of the room. Approach the safe hidden behind the tiger picture and press Action to access the combination entry pad. Enter 7-2-1-3. The safe opens, revealing Den's Map, Pass for Security HQ, and a Transcan Tape. Stand in front of the Transcan Player and Use the Transcan Tape to view its contents. What you see is Den telling everything he knows about your investigation. Tarek, the demon-possessed traitor, has slipped into the room after you. He is very pleased you have found this evidence so he can destroy it. Since he's already taken care of Den and Anissa, he is very excited about killing you. Be ready to fight Tarek. If you win this fight, claim five Magic Rings. If you lose the fight, the theft of your soul is interrupted by the arrival of a neighbor. Alarmed by the noise, Plume has rushed in and becomes, against her will, the new host of your wandering soul.

Quest for the Power Rod

Depart Den's apartment and summon your Sneak. Direct it to the supermarket in Zone 9. North of the supermarket's front door, meet the monk who will guide you to the Sorcerer's Shop. Give the monk Telis's Talisman and follow him to the secret Sorcerer's Shop. Glance at the Rings rotating left of the counter and approach the shopkeeper. The sorcerer tells you that he can forge a Power Rod only if he has a piece of the evil thing to be destroyed. Thankfully, you have the sample from the corpse at the Morgue. Use it to give it to the shopkeeper. He's impressed and makes your Power Rod.

Infiltrating Gandhar's Office

Leave the Sorcerer's Shop and head straight for Security HQ. You still have Kay'l's Police Badge in your possession, so you still have full access to HQ no matter what body you inhabit. Descend to the Ventilation Room on Level 5 and walk to the four-way intersection at the end of the hall. The doors ahead and to the right are locked for the moment. You will be returning to this intersection several times. At the intersection, turn left and follow the hallway. Go through the door into the ventilation control room. Walk to the large window overlooking a set of gigantic fans. Left of this window is a card reader. Use the Pass for Security HQ you found in Den's wall safe to open the switch room to the left.

Enter the switch room and pull the switch on the console. Watch as the horizontal fan grinds to a halt. Turn right and activate the black switch on the wall. This opens the window to the fan chamber. Walk to the window and press Jump to leap into the water below. Swim to the right and keep your eyes open for a tunnel leading out of the pool. Surface and pull yourself out of the pool. Stop to pick up a length of Electric Cable and proceed up the hallway, through a door, and back to the four-way intersection. Return to the control room and stand in front of the electric panel along the wall. Use the Electric Cable in front of the panel to short-circuit the fan engine. You'll see the side fans wind down and the other door at the four-way intersection draws open. Leave the control room and return to the four-way intersection. Go through the twelve o'clock door and approach the inactive fan at the end of the hall. Jump onto the horizontal fan blades in the center of the chamber.

From this point, there are three hallways leading off of the fan. Recall Den's Map: you want to go to the hallway to the right. Run down the hall and through two doors. Through the next door is an elevator. Activate it by pressing Action. Exit the lift and turn right at a T-intersection. Find a set of Rings and continue down the hall. Cross a bridge and continue toward the end of the hall. The floor, however, suddenly drops out from under you and you fall into the commandant's office.

The Gate

Boz As you approach the stairs, you meet an old friend. The demon you met at the beginning of the game appears behind you and wants another piece. Beat him down. If you lose this fight, there will be no rescuing your soul; no one comes to save you. Before proceeding, pick up five Magic Rings, a Life Potion, and a Dodge Potion. Stroll behind Gandhar's desk and open his drawer. Extract a pass to the Jaunpur district. While standing near the open drawer, press Action again to activate a switch built into the drawer. A panel opens. Face the panel on the wall and press Action to access it. You will need to enter the combination you got from Anissa. To open the door, illuminate the following buttons: Line 1, Button 6, Line 2, Button 4, Line 5, Button 3, and Line 6, Button 5. Go through the green portal. Walk toward the cave passage. As you go, you meet a mysterious apparition. Converse with him. He addresses you as "Nomad Soul" and conjures a set of Rings. This serves as an auto-save position.
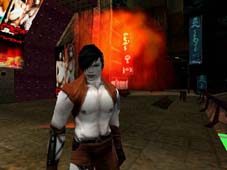
As you head down the passage, you switch to Shooting Mode with your Power Rod armed. Walk carefully down the hall, plugging any of Gandhar's minions who assault you. Before touching the bridge, shoot all of the creatures milling around the edges of the room or they'll cause you trouble during your fight with Gandhar. Approach the bridge in the center of the room to meet Gandhar in his true form. He dives into the lava and emerges as a gigantic beast. Take cover behind any of the rocks around the edge of the room and direct your fire at Gandhar's head. If you are killed, you'll start over at the auto-save position. When you vanquish Gandhar, he and his Gate plunge into the fiery lava below. Mission accomplished. As the cavern collapses, your character runs for a newly created hole in the wall. Heading for Jaunpur Jump into the pool of water and surface in the city streets of Anekbah. Jenna waits for you as you emerge. She congratulates you on your success and advises you on your next move. You are to go to Jaunpur with your pass and meet a man named Yob at the temple. He will take you to "someone who wants to talk to you." Before departing, however, visit the beggar north of the restaurant on Tahira Street. Give him the Life Potion. He gives you your reward and a pass.

Go to the portal to Jaunpur. You will need to show your pass to the Mecaguard to enter. If you are still inhabiting Kay'l, you will have a small problem: Kay'l has been listed as a fugitive by Commandant Gandhar. The Meca will blow you to smithereens rather than admit you. Luckily, a nurse, Ysmala'n, touches Kay'l's body and his soul transfers to her. Since the Mecas are expecting Kay'l, you can avoid this fate by approaching the portal with any inhabitable character other than Kay'l. If you already involuntarily inhabit another character, you can pass through unmolested. If you're still in Kay'l, you can simply let his fate play out or jump into any of the inhabitable characters in Anekbah or Qalisar.


Part Five: Into Jaunpur

The Temple Awaits


To begin, call the Slider and order it to take you to the temple. When you emerge, the temple is directly ahead of you, but there's no obvious way to get to it. If you face due east, you will see a man exercising along a wall ahead; to his right is an archway. Pass under the archway and turn left, then left again, and go up a ramp. The door to the temple isn't exactly obvious; on the metal wall to the right, the center panel is outlined in green. When you enter the temple, you find several worshippers and a set of Rings. Explore the temple and you may bump into a likely candidate for reincarnation, the monk Itzam'a.

Meet the Awakened

Continue through the temple toward the floating altar. You will see a man standing near two pyramid-shaped candles on the right. This is Yob, the man Jenna told you to meet. Talk to him and he leads you through a red door behind him. Pass through a second door and enter a statue room. Yob, however, is nowhere to be found. Pick up the two candles on the base of one of the statues. Note the metal door peeking out from behind one of the statues. Turn around and look on the wall for the Awakened symbol with a red hole in the center. Press Action to climb atop the sarcophagus and Use Telis's Talisman on the red hole. The statue rolls aside, exposing the metal door to a lift. Jump into the lift and ride it to the underground base of the Awakened.

Enter one door, cross a bridge over the base's main room, and go through another door. Follow a winding passage until you come to a pair of white doors. The one in front of you is Jenna's cell. To the right is the main floor of the base. Turn right and go there. You will meet again with Jenna, who is a rather high-ranking member of the Awakened. Ever since your interrogation of her, she has known what you are and she thinks you have potential. As a gift for declaring her innocent, she gives you a Regeneration Potion. Follow Jenna to Dakobah's cell. She instructs you to come see her in her room when your meeting is over. Inside, you meet with one of the Awakened's leaders, a Yashu priest named Dakobah. From this conversation you learn some very beneficial information.

Go to Jenna's cell to report on your meeting and your admission to the Awakened. She gives you a bit of history to put your initiation in perspective. Enter Namtar's cell to meet your immediate commander. He gives you a mission: blow up the bridge in Zone 12 to cut off Tetra's weapon supply line to the Omikron Police. Jenna will be your partner.


Part Six: More Fun in the Desert Town

Blow the Bridge


Consult with Jenna. She advises you to introduce yourself to everyone at the base. Then, get the explosives for your mission and go to the bridge in Zone 12. You'll need to find a way to reach the pillars under the bridge and place the explosives at the base. Time to meet your fellow revolutionaries. Turn left as you leave Jenna's cell and left into the second door. Turn right to introduce yourself to Krill. You find him on his bed. The weapons specialist seems a bit hostile. Still, if you ask him which kind of explosives suit your mission, he will tell you: KR100. Take the Detonator from the cupboard before you leave. Return to the main floor and look for Soks, the supply droid. His shop is on the lower level, behind a small door near the Rings. After he questions you about what kind of explosives you'll need, he presents you with the KR100. Visit Yob in his cell/training room on the lower level opposite Soks' shop. Converse with him and spar a bit before taking your leave. Finally, go to the door next to Yob's to meet Meshka'n. Your conversation yields interesting information. To exit the base, find the secret elevator in the same hall as Jenna's cell. As you come through the door from the base's main floor, go straight and follow the path until you see a hall leading off to the left. Go down the hall and ride the lift to the surface.Exit the elevator in this small alcove of doorways.

Follow the path out and keep making left turns until you arrive at the street. Call your Slider and go to the bridge in Zone 12. When you arrive, the bridge will be straight ahead, guarded by a Meca. Run up the ramp to the bridge and survey your task. You'll have to find a way to get down to the bridge supports to make this work. Cross the bridge and head south. As you walk south toward the docks, you will pass by a wall with some metal studs in it. You'll come to a large door manned by a guard. Reincarnate into the guard, Jayli'n, and scale the wall at the handholds. When you drop inside, you'll see your auto-save position.

Walk past it and the shooting sequence begins. Your mission is to go through the freight yard to the docks. The door, however, is guarded by two Mecaguards. You need to draw them away from their post by causing an accident with the freight yard's crane. You'll immediately notice that no one is shooting at you because you look like one of them. As long as you don't shoot anyone and don't pull any switches, you'll have all the time you want to scout the area before attacking. Your goal should be to locate the switches and the exit and then go to the first switch and pull it. Then you can shoot whomever you like.To find the second switch and the door to the docks, go forward from the rings and take the first left. Go straight and turn left at the end of the aisle. Switch #2 will be about halfway down on the right. You can't pull it yet. From Switch 2, walk forward and turn right at the wooden box at the end of the aisle. At the corner, turn right again and you'll see two Mecas guarding the door to the docks. Retrace your steps to the Rings. Walk forward from the Rings and turn left at the corner near the big metal door. At the T-intersection, turn right. Go straight to a large stack of pipes and turn left. Take a couple steps forward and turn right. Walk another few steps and turn left in front of the Mecadog. Turn right at the corner and go straight to the corner of the wall. Go straight and left around a metal box. Follow the path around two lounging guards to find the first switch. Now you are ready to rock. Gun down the two guards nearby and pull the switch by pressing Action. Retrace your steps back to the Rings and cut a path to the second switch. When you pull it, you'll see the crane self-destruct and the two hulking Mecas run to see what all the rumpus is about. Run behind their turned backs and head for the now unguarded door. Go through it to end the shooting sequence.

On the docks, you will automatically pull a switch. This lowers a platform, granting you access to a barge parked below. Jump down to the lowered dock and note the Rings quietly rotating to your left. Jump onto the first barge and press Action to pull the switch. The barge sails over to another barge. Jump onto it and pick up two Magic Rings hiding behind a box.Dive into the water and search for a submerged barge. Next to it, a long wooden switch juts up from the base of the canal. Pull it by pressing Action and the barge will surface. However, it's too high for you to climb upon. Swim toward the eastern shore of the canal where a platform floats next to the edge. Climb onto it by pressing Action while treading water at the surface. Pull the switch to ascend to the shore.Walk to your left to a control panel and pull the handle to position the last platform. With everything in place, jump back into the canal and swim back to where you started on the docks. Jump on each platform in sequence until you get to the bridge pillar. If you haven't already done it, select the Detonator and Use it on the KR100. The result is a bomb. Stand next to the pillar and press Action to place the bomb. Now you have a choice. You have five seconds to jump into the water before the bomb explodes. If you do, you keep your current character. If not, he/she dies and you'll be reincarnated in Kuma'r, a passerby. Either way, you return automatically to the Awakened base.

Awakened TV

Go to Namtar's cell and speak to your boss. Accept his congratulations and indicate your desire for another mission. To pave the way for an Awakened pirate message over the Transcan broadcast system, you must plant a device on the broadcast dish in Zone 22. First, you'll need to go meet a contact to get the pirate device. Go to the bookstore in Zone 9 via your Slider. From where your slider drops you off, turn right and go straight until you reach a building. Turn right and immediately left. Walk forward past a restaurant. Farther along, down a couple of ramps, you will see the bookstore on the right. Enter and descend the spiral staircase. Talk to the man standing on the store's right side. Show him Telis's Talisman and he'll put the pirate device on the shelf. Pick it up and leave the store. Drive your Slider to Zone 22 Roof Access. Once there, walk east through a gateway.

Go through a second gateway door into an open area. To your right are a supermarket and a sewer tunnel, each containing very diverse inhabitable characters. Follow the iron fence on your right. When it ends, look for an alley to the right. One of the walls has handholds that could function as a fine ladder. Climb the handholds. Note the Rings and look below to see a Mecaguard covering the door to the broadcast dish. Walk to the second crate and press Action to push it over the edge. The weight of the crate disables the Meca. Climb back to the ground by standing near the top of the ladder and pressing Action. Walk around the fallen Meca and through the door. There, step onto the crane and press the big red button. At the top, you'll be provided with an auto-save point.From the first platform, jump to the square building ahead and to the left. Climb down to the lower roof via the handholds. Sneak carefully forward and right to another set of handholds. Climb down to the lower roof below. Cross the wood plank to the next building. Continue straight from the plank and jump to the next building.

From here, climb down the handhold ladder to the ground. Walk forward to the second alcove on the left, where a ladder climbs high atop the next building. Turn left and follow the building to a plank heading right. Go down a short ramp to another plank leading down and right. Turn left and descend a ramp to a lower rooftop. Cross the plank to the right to the building adorned with stars. Turn left and descend the handholds to the ground. Turn left and walk to the corner. To your left is the transmitter tower. Pivot left and cross in front of the tower. Turn left again at the end of the tower. Make one more left to face a ladder leading up. Rotate left to see another ladder leading up to the dish itself. Approach the transmitter and press Action to plant the pirate device. Watch the pirated message and get your first view of Boz. Pick off as many enemies as possible from the safety of the dish roof. Note that you will not be able to fell Mecaguards, though you can outrun them. Once you've scoured the horizon, descend to the floor and retrace your steps to where you descended from the star-encrusted building. Move past the ladder on the starred building and turn right. Take the first left. Then go right and left. Head straight toward the fence and turn right at the corner.

Go straight until you see a ladder on your right. Turn right and stand as far back in the line of boxes as possible. Run toward the next building and jump to reach it. Turn left and descend the ladder to a lower roof. Run and jump to the roof directly across from the bottom of the ladder. Your escape will be narrow but successful. You return automatically to Awakened HQ. Upon your return, you speak with Jenna. She congratulates you but was surprised that the antenna was so well guarded. Report to Namtar's cell to inform him of your success.Namtar tells you to take a rest as a reward for a job well done. He gives you the key to a hideout at 8250 Konera Street, Jaunpur.

Sanctification of Xenda'r's Beshe'm

Go visit Dakobah; he offers to teach you sorcery. To cast a spell, he tells you, you need a sacred bowl and the ingredients to mix in it. Dakobah gives you the key to his private library so that you may study the Ancient Art. Before going to study, go to the floor of the base and talk to Soks. He complains again of his difficulties with dampness. Turn left and go to a nearby table to pick up a can of Insulating Spray. Give this gift to the robot, Soks, and he will give you something valuable in return. He gives you a Hydromagnetic Piston. You never know if it will come in handy.Go to Dakobah's library and rummage around on the lower floor. There's a chest here, but it's locked. A Life Potion sits on the desk. Two books on the shelves stand out: "The Magic Signs of the Art" and "The Book of Beshe'ms." Go to the broken lift next to the shelf and Use the Hydromagnetic Piston on it. It now functions properly and takes you to the upper level of the library. Search the upper stacks for "The Secret Rites of the Art," "Amepher Dew," "The History of Xenda'r Temple," and "Ars Magica Volume XXXVII."

Descend the lift and go to the hallway outside of Jenna's cell. At the end of this hall is a blocked door containing the same symbols shown in "The Magic Signs of the Art." Some of the symbols, however, are not in the books. You can deduce the meaning of these codes because the marks on these doors are simple addition equations. Jot down the symbols for ten and fourteen and go to the hall outside of Krill's cell.

You find another door that seems more accessible. Approach it and press Action to view the locking mechanism. Do the math to come up with a solution. Dakobah congratulates you on finding Xenda'r Temple. You may find the Beshe'm within. Venture inside. A green platform on the right holds five Magic Rings and Drops of Shadow. At the base of a large tree, pick up a Cepher Leaf. The door at the head of the room is locked. Jump into the water and swim to a pool beyond this door. Descend the path to the lower floor, noting the Rings near the pool. At the base of the ramp lies the body of Xenda'r, the sorcerer. Search around his body for Powder from Dead Man's Skull, Vyagrimukha's Jewel, and the Beshe'm. To set up the ceremony, stand at the center of the rocky platform in the middle of the room, facing Xenda'r's corpse. Place the candles on the two unmarked platforms to your right and left. Place the Drops of Shadow at the twelve o'clock position. Place the Cepher Leaf at the four o'clock position. Place the Skull Dust at the six o'clock position. Place the Amepher Dew at the ten o'clock position. Place the Beshe'm on the central podium. Step back to the intersecting lines near the middle of the platform and the ceremony begins. Pick up the Sanctified Beshe'm and head back to the base. There, talk to Dakobah and show him the Beshe'm. Now it's time for a little relaxation in the Awakened's hideout.


Part Seven: Betrayal

At the Hideout Leave the Awakened base and drive your Slider to the hideout. From where the Slider lets you off turn left and run to the right of a building with a gray metal door. Walk around the building and under the Kloops Beer sign. Turn right at the wall decorated with blue mosaic tiles. Turn right at the corner, go under a short wooden bridge, and veer right. Take the second right to find the hideout's door. As you unlock the door, note the Rings in the hole in the wall to your right. Descend the stairs to the left into the safe house's main room. Jenna is waiting to talk to you.

Tetra Sabotage

No time to rest; a new mission has arisen. You are to infiltrate the Tetra Trust's factory and sabotage the production facilities for a new generation of Mecaguard, the Z-Tech 4000. Once inside, you must place eight time bombs on assembly line control panels. You are to meet with a man named Qazef to find a secret entrance to the factory. Pick up the detonators, two Magic Rings, one hundred Seteks, Kloops Beer, Xiam Noodles, an Ad for the Wikis Garden, and a Large Medikit. Take your Slider to the gun shop to meet Qazef. The shop is below street level, west of the Anekbah Gate. Qazef won't speak to you about the Tetra factory and there's nothing you can do to change his mind. Scope the woman lounging by the gun rack. Iman is not only one of Jaunpur's many inhabitable characters, she is one you must use to continue. Reincarnate into her. Now talk to Qazef in your new body. He seems much friendlier. Ask him what you want to know in exchange for some of your "time." Qazef spills that the factory is at 2130 Madeeb Street and you can gain entry via the sewers. He, however, doesn't know exactly where; you'll need a Sewer Map from one of the bookshops. Now leave him hanging and go about your business.

Go to the bookstore near the temple and buy a Sewer Map. Call your Slider and take it to the Tetra headquarters. Turn right at the wall marked with a star. Veer right down the hall adorned with blue mosaic tiles. Continue west a few paces to the canal's edge and a ramp down to the water. Dive into the water and search nearby for a lever. Pull it and the door to the sewers opens. Climb out of the filthy water and you'll receive a transmission from Jenna. Walk forward and drop into the showers of a locker room. As you enter the locker room, a brute attacks you. Fight him to the death and note the symbol tattooed on his chest. Find a locker with the same symbol and open it to pocket the Tetra 1 Pass and a Large Medikit. Use the Tetra 1 Pass to go through this door and begin the shooting sequence.Your basic mission is to plant eight bombs on eight of the consoles scattered throughout the base and escape the base before the bombs detonate. Pass the auto-save rings and get ready to rumble.

Turn right and go up the staircase at the end of the room. Go through the door at the head of the stairs and head down toward the tracks. Stand against the wall from which the train enters and run across the tracks as soon as the train passes. Go to the control console and press Action to open a door back in the initial room. Return the way you came and go back through the door. Run across the catwalk to the newly opened door. Pass through, briefly exiting Shooting Mode, and go through the next door. An auto-save station awaits.

Go forward and descend the stairs. Push forward through the room to a staircase leading up to a catwalk and a door. Look for these doors throughout the level; most of them contain the control panels you seek. Simply walk up to them and press Action to place the bomb; you'll get a message confirming your action. Just don't do it now. Continue through the room until it's blocked by boxes. Run into the hatch to the left, but stay off of the conveyer belts. Go through the door to the other side of the line of boxes and continue across the room.When you enter one of the side rooms, you will switch out of Shooting Mode. A guard, Bahimy'l, sits slumped against the wall. Reincarnate into him to operate stealthily for the next few moments.

Remember, don't shoot anyone or place any bombs or you'll blow your cover. Walk out of the room and go to the end of the hall. The metal door here is locked tight.Turn left and go through either of the doors to a bridge room. Once through the door, it's OK to waste the two guards here. Cross the bridge and go into the office to find a console. Press Action to unlock the metal door. Pressing this blows your cover and you'll be a target again. Once the door is unlocked, go back and place bombs in all of the rooms off of the catwalk. Don't forget the one behind the line of boxes. Go through the gray metal door to reach another auto-save station. Descend the ramp and scale the stairs to a catwalk. Stroll to the end until you find yourself under a pulley. Press Action to ride the pulley across the gap. Be ready to fire immediately when Shooting Mode resumes.

Go down the steps to a T-intersection. Go right and upstairs to a catwalk with three rooms: two contain control panels and one has a console that starts the conveyer belt. Doing this clears the way to the next part of the sequence. Go back to the T-intersection; go straight across and right. Press forward until you see a door on the right. Plant another bomb. Emerge from the control room and climb the stairs across the room. One of these rooms leads to the next section; the others have control panels just begging for bombs. Approach a pedestal with a wheel crank. Rotate it to swing the walkway over to you. Jump over the small gap to get to the central hub. Turn the wheel once to swing the walkway to the door. You may also rotate it once more to access a hidden cache containing a Medium Medikit and Decagun Ammo. Pass through the door. Stand against the wall, wait for the train to pass, and dart across the tracks. Climb the stairs on the other side of the tracks and enter the green-illuminated tunnel. When you come to a grating in the floor, press Action to slide it aside. Below you is a train tunnel into which you will soon drop, but not yet! Wait for the train to pass and run across the tracks to an alcove with a Small Medikit.

Turn around and wait for the next train to pass. When it does, dart left and across the tracks to another alcove with a door. Pass through the door. Remember, if you're struggling to find the alcove, run back to the one you just left or you'll be wheel grease. Enter a large control room with three rooms branching off and a large lift in the middle. Each room contains a control console and a scary-looking Mecaguard. The lift must be activated by pressing buttons in all three rooms. Unfortunately, pressing these switches also releases the trio of Z-Techs. Push the switches and make a beeline for the lift. Ride it to the top and your mission is complete. Walk down the passage and meet with Jenna. Unfortunately, the celebration is short-lived, as the authorities descend upon you both. You and Jenna are transferred to the prison facility at Pamoka.

Escape from Pamoka

You wake to be interrogated by the Security Chief, Mashroud. You are given a choice: leave a free man or a dead man. Of course, you refuse to give him the information he desires. He gives you a few hours to reconsider and dispatches a guard to watch over you. Suddenly, you hear a voice through the wall: Jenna! She tells you to find a way out of your cell, find a Multiplan to reactivate your Sneak, and set her free. Notice the Rings in the corner and grab the bowl on the floor. If you insult the guard, he fires off a shot from the electric disciple ray in your cell. Select the bowl and press Use. Then pick an insult and the bowl will perfectly reflect the guard's beam at him.Reach out of the cell and inspect the body for the Guard's Key. Pass the door to Jenna's cell and enter a hall where a guard seems preoccupied by something out of the window. Enter the door behind him and access the Multiplan terminal to recover your Sneak's contents. Reincarnate into the guard, Zao'r, and return to free Jenna. She recommends pretending to be a prisoner that you, as a guard, are transferring. Follow her through the hall and down to a lower floor. Chat with the guard at the door, who grills you about your activities. Pick your excuse and stick by it and he'll let you go unmolested. You and Jenna board the Slider and return home.

Unmasking a Traitor

The Nomad Soul Jenna tells you she is sure that a traitor lurks within the Awakened. Go see Soks to find out what he's heard. You coax him to distract Krill while you snoop around his cell. It's as good a place to start as any. Turns out Krill's asleep. Soks lets you in. Open Krill's cabinet to swipe his screwdriver. Other than that, there's really nothing to see here. Peek in on Meshka'n. Since his door's locked, you must Use the Screwdriver to get in. The good news is that he's eliminated as a suspect; the bad news is he's dead. Pick up Meshka'n's Journal from his desk.

Ransack the two cabinets: one is locked, the other holds Meshka'n's Key and Acid. Go to Dakobah's library and use Meshka'n's Key to open the chest. Inside, find Dead Man's Tongue and Dew of Light. Visit Yob, who's busy training Namtar. Rifle through Namtar's clothes on the floor to find the key to his cell. Quietly open Namtar's cell and venture inside. Careful inspection reveals that his cabinet appears to have been slid across the floor. Walk around to the right side of the cabinet and press Action to push it. A hatch in the floor can't be opened. Use the Acid near the hatch to burn it open. Pick up the object hidden under the hatch. It's a Demoniac Cube. As you walk away, a message intended for Namtar comes through the cube. Not only is Namtar the traitor, he's also a demon!

Remembering the recipe for the Unmask Demon Spell, you should grab the horn off of the Sham head on the wall. Enter Yob's cell to confront Namtar. An auto-save station appears just outside of the cell as you enter. You can't go after Namtar while he's human or Yob will defend him. You must unmask him first. Go into your Sneak and Use your Beshe'm with the Sham Horn and Dew of Light. The result is the Unmask Demon Spell. Cast the spell by Using it and fight the demon inhabiting Namtar's shell. After your victory, Dakobah and Jenna thank you for your keen detective work. Dakobah gives you "Ars Magica Volume XIX" as an expression of gratitude. He has also arranged a meeting with Boz at the leader's old house at 1211 Tramesh Street.

Meeting Boz

Leave the base via the elevator and take your Slider to Boz's house. The door to Boz's apartment is next to where your Slider drops you off. Turn right and go through a door to find Octagun Ammunition and an Octagun. Descend the ramp on the left side of the room. Two Magic Rings sit around the periphery of Boz's chamber. Approach the control panel and press Action to talk to Boz. From this conversation, you learn several unsettling facts. Pick up the Pass to Lahoreh on your way out of the room. Hop in your Slider and take it to the Gate to Lahoreh. Show the pass to the Mecaguard and go through.


Part Eight: Lahoreh

Research at the Library


Immediately upon your arrival, head for the library on Lahoreh district's northeast island. It's a massive building with a pyramid on top. As you enter the stacks, you get a message from Jenna. She tells you the location of the new Awakened base, right here in Lahoreh. You'll find it near the bank, southeast of the library. You'll go there a little later. Explore the perimeter of the library's Main Reading Room. Pick up any stray books you find on the tables. You should be able to pocket: "Taar Fight Techniques Volume 9," "Taar Fight Techniques Volume 22," "Eye of Vyagrimukha Parchment," and "On Parallel Universes." Take a stroll into the central stacks on this floor. A guard mans an elevator. Only researchers are allowed, so go find a researcher. In the history section you find Enay'd, a professor. Reincarnate into him. Now address the elevator operator again. When you get to the upper floor, approach any of the shelves and press Action. Borrow all of the books listed. The last book is, to say the least, the most important. Go chat with the other researcher in the room to see if he can help translate the text. He suggests you get a Tradutech like the one he has. He agrees to lend it to you if you do some research for him. He's looking for the "Aegmaar Index of the 3rd planet of the 4th System" but is too old to go hunting through the library. Drop any books you got from this level into the deposit box to the left of the researcher; you can't leave the floor with them. Go to the lower floor.

Downstairs press Action near any shelf and buy "The Quartet System" and "Tables of Cosmic Correspondence." Since you're here, also buy "Masa'u Runes." Checking the "Quartet" book, the Cosmic Coefficient of the third planet, Kalisha, is 13.5. Check that number in the "Tables of Cosmic Correspondence" and you get an Aegmaar Index of 0.1851. Go back upstairs and tell the professor what you found. Now, pick up his Tradutech. Unfortunately, you'll have to be discreet with the Tradutech. Go to the light switch on the wall and press Action to shut the lights off. When the room goes black, access your Sneak and Use the Tradutech on the book. When the guard restores the lights, you will have a translated copy of the text. The book is automatically returned to the bin and the Tradutech has gone back to its owner. The good news is that you already have one of the three Vyagrimukha stones. Leave the library.

The Well of Yrmal'I

Head southeast to the hidden entrance of the new Awakened base. Walk past the bank until you come to a wall. To your left a seemingly solid rock wall abuts the river. Walk over to it, move to the far left side, and press Action to open the door. Follow the corridor until you reach the core of the new base, built into a forgotten monastery. Directly opposite you is the entrance to the ancient monastery itself. A Lahoreh Secret Concert Flyer and fifty Seteks have been abandoned on a table by the water. To the right is Dakobah's new office. Go there now. Approach Dakobah and press Action to show him your translation. The conversation reveals several instructions. Before you leave Dakobah and Jenna, grab the Mana Potion from the desk and a Magic Ring off of a chair. Go to Yrmal'i Square and enter any of its doors. Around the edge of the well, one door is different from the others. This is the elevator to the apartments above. Several inhabitable characters keep their abodes here; to access their apartments. Use their keys in the elevator.

Stand in the center of the room. Four columns, each with symbols on top, surround a central disc in the floor. Offset from the middle is a triangle. If you press Action near one of the columns, the symbol closest to you will retract. The key to solving this puzzle is to know which symbol should be depressed on which column. A map on the wall provides a clue. Four marks in the city could very well correspond to the locations of the symbols. The clues, when you find them, show both the correct icon and the position where it belongs in relation to the offset triangle. To find the first mark, go to the bookstore near the Gate to Jaunpur. Walk north until the sidewalk veers right toward a gray building that juts out over the water. Dive into the water and swim toward the building; the first symbol is dead center: two wavy lines, lower right corner. The second symbol is close by. Go back to the bookstore and face the bridge to the west. Dive into the water and swim to the opposite shore. Just at the waterline under the bridge is the second symbol: a circle bisected by a line, upper left corner. The third symbol is in the Sorcerer's Shop. Take the ramp near the supermarket up to the shop and look for a knocked-over column to the left of the counter. On the back side, you'll see the third symbol: two wavy lines, upper right corner. While you're in the Sorcerer's Shop, buy a bottle of Drops of Shadow for the little Resurrection Spell you'll be casting soon. The fourth symbol can be found in the restaurant. Go up the ramp and follow the balcony until it ends at the fourth symbol: parallel lines crossed by a single line, lower left corner. Return to the Yrmal'i Well.

Note the triangle planted off-center in the middle of the room; this should look familiar from the pictographs you've just seen.

Note the background features in each figure above to ensure you're working with the correct pillars. Adjust the four pillars to their appropriate symbols in relation to the triangle. When the proper symbols are displayed, the disc in the center of the room reveals itself to be an elevator. Step on it to descend.

In Search of the "Right Eye of the God".

Your search for the second Vyagrimukha's Jewel begins at the base of the Yrmal'i Well. Venture through the elevator doors into a very strange room. Five pedestals sit in the middle of the room. Approach the pillar in the middle and press Action to touch it. You will hear a four-note tune that you must reproduce on the four surrounding pedestals. You must duplicate two tunes to unlock the tunnel at the far end of the room. This is the order of the first tune: lower left, upper right, lower right, upper left. The tune replays if you get it right.Touch the middle pedestal again to get the next tune, this one six tones. The solution is: upper right, upper left, lower right, lower left, upper left, lower left. When the second tune is played back, the lift to the tunnel lowers to ground level. Before heading into the inner chamber, however, scour this area for a Mana Potion and a Life Potion. As you board the lift, notice the markings etched into it. These are your directions to find the correct stone in the next chamber. Here are the instructions translated into conventional directions:

(1) North 3, (2) East 2, (3) South 1, (4) West 3, (5) North 2, (6) East 2.

You enter a burial chamber at the southern point. Notice that the four directional symbols adorn the walls. Each casket contains a jewel; they all look identical but only one is authentic. To find the correct jewel, stand in the doorway and walk north to the third casket in the center aisle. Turn right and go two caskets east. Turn right again and travel south one casket. Turn right to go three caskets west. Make a right turn to pass two caskets to the north. Finally, turn right to go two caskets east. Open the casket by pressing Action, and take the jewel. Be sure you have the right one; you won't know you've grabbed the bogus jewel until you're miles away. Pack up your stuff and head back to Jaunpur and on to Jahangir Park.

Part Nine: City of the Dead

Another Jewel in Your Crown Exit Lahoreh through the Gate to Jaunpur. Hail your Slider and point it to the entrance to Jahangir Park. The Slider will only take you as far as the southeastern gate from Jaunpur, so you'll have to hoof it from here, running east from the drop-off point, through two huge blast doors, past the rooftops shooting sequence location, and to a courtyard with a staircase leading up. At the top of the stairs, turn right to find the door to Jahangir Park. Walk through it. Just inside of the gate, make a mental note of a set of Rings. You'll need one more ingredient for your Resurrection Spell: a Jinpan Feather. Walk forward and turn right to see a bunch of Jinpan birds on some rocks. Dive into the water and surface on the small outcropping of ground below the birds. Press Action to climb up to the rock ledge. You'll scare away the bird, but it will leave behind what you need. Press Action to climb back down.Staying on the same side of the stream, walk left. When the path widens, turn 180 degrees to see an opening for a tunnel. Follow this seemingly endless tunnel up and up into a high tower. At the top, on a windowsill, find the final Vyagrimukha's Jewel.

Tomb Raiding

Return to the park entrance and turn to see a large structure in the middle of the park. Approach and enter it. The walls of this room are lined with buttons, each featuring a letter of the Masa'u alphabet. Choose the letters that spell K-I-W-A-N. Push the buttons in his name by pressing Action. When all five letters are depressed, the floor descends into the ancient sorcerer's tomb. Follow the corridor to find Kiwan's mummy. Mix the Jinpan Feather and the Drops of Shadow in your Beshe'm. The result is a Resurrection Spell. Kiwan seems less than thrilled to have been awakened and gives you a hard time about your intentions. No one, it seems, has ever returned from Hamestaga'n alive. Still, he agrees to open the eastern gate. All you need to know about finding Hamestaga'n, he says, can be found on two maps he suddenly unveils. Check them out.

Off to Meet the Head

Leave Kiwan's tomb and turn right until you arrive at the water surrounding the tomb. Dive to the bottom of the pool and look for a passage marked by columns. At the end of the passage, you see the switch exposed by Kiwan's action. Pull it and get back to the surface before your air runs out. Go around the tomb and look for the tall tower to the east. Head for it. Past the tower, look for a stream with a pair of columns near it. Pass through and turn right at the first opportunity. When the path splits, go right. Turn right at a doorway marked by columns. Look for the gigantic head of Vyagrimukha at the back of the cavern. Place all three jewels in the god's head; it rises to open a passageway.

Stalactite, Stalagmite

Go through the passage to a pool. Dive in and surface in a pool on another level. Follow the hallway down to a doorway and pass through into Mayere'm. Climb the ramp to a wooden bridge. As you cross, the bridge retracts behind you. Note that the elevator serving Tower #1 will be your route to the ground level after you've met with Soyinka. The central tower of this complex seems pretty important, so go there. Unfortunately, all of the bridges are retracted. Cross the rope bridge to Tower #2. Turn right and cross the next rope bridge. Turn left to cross another rope bridge. Go to the far end of the room and press the big green button to lower a wooden bridge. Go to the elevator and press Down to drop to a small platform. Cross the wooden bridge toward Tower #2. Follow the walkway to the left and cross a rope bridge toward Tower #3. Turn left to get on the elevator and press Up. Follow the walkway to another rope bridge. Turn left to find another green button. Press it and inspect this room for five Magic Rings. From the Magic Rings, turn right and step toward the last portal in the room. As you approach it, an elevator rises to meet you. Jump onto the lift. Turn left from the elevator and cross a wooden bridge. Follow the walkway to a retracted bridge. As you approach it, it drops into place. Unfortunately, there's a gap in the bridge that must be jumped. At the end of the bridge, turn right and board the elevator. Take it up. Go straight from the elevator and turn left to see a platform leading to the central tower. Mount it, press Action to launch it, and enjoy the ride. Welcome to the throne room of Soyinka, goddess-queen, daughter of Matanboukous. This conversation reveals some historic details.

Passage to Hamestaga'n

As all of the central pillar's bridges lower, turn right as you leave the throne room to find a set of Rings. Left from the throne room door is the bridge back to the first tower. Take the elevator here down two floors to the watery ground level. Turn around and search the distance for a long white fence. Swim toward it and go through one of the fence's open spaces. Go left and turn right at a pair of large barrels filled with a stinky green goo. Smell the goo by pressing Action. If you need a Sham, you'd better talk to the man grooming one. He is Fodo and he offers you the Sham of your choice. Just ride, he says, to a split in the rock nearby. If you've smelled the green liquid, ask him what it is.

If you try to ride the available Sham, however, it refuses to let you aboard. Talk to Fodo again about your problem. To mount one, you'd have to be Azkeel. Drink the zkilbon. As you expire, Fodo comes to lend a hand and ends up lending far more than that. Mount the Sham and ride to the right of the compound. Approach a large rock in the wall and press Action to have your Sham push it aside. When it does, you dismount to finish your journey on foot. Enter the passage to the City of the Dead. Pass through a large silver door. As you head to the final door to Hamestaga'n, you are attacked by a Krubor. If you defeat this creature, you'll proceed as Fodo. If, however, you succumb to the beast's savagery, you get a surprise: reincarnation into the body of the Krubor. It's not a bad trade, but you'll want to go easy on the Krubor in the fight so you don't damage your next body too much. Go through another silver door into Hamestaga'n.

Ghosts in the Cemetery

As you approach the city, you'll enter Shooting Mode. You must get to the "Book of Nout" on a platform straight across from your starting point. In this first phase, you'll need to direct your fire at the devil dogs patrolling the graveyard. Go past the fountain at the center of the cemetery. The platform beyond it houses the "Book of Nout." Press Action to talk to the book and gain valuable insight. As the conversation ends, you read the cover of the "Book of Nout."

The opposition gets a bit thicker now. Several evil souls now wander the cemetery and they're coming out shooting. These same enemies inhabit all crypts other than the three you seek.Go to the crypt east of the fountain. Open it by pressing Action and one of the three ghosts you seek will meet you back at the book. Next, move northwest from the fountain to another crypt. Go to the book and face south. Slide down the wall and look for a ledge leading northeast. Follow that ledge. Look left for a crypt sitting alone by a small staircase. Jump down from the ledge, descend the stairs, and release the final ghost. Return to the book and meet with the ghosts.

Finding a Hero

Together, the ghosts teleport you to Mahahaleel. Walk forward to locate a set of Rings. Continue forward until you see the airship and descend a ramp to the ground below. Near the front of the ship there's a low platform with a ramp leading to it. Climb the ramp and walk onto the platform and you'll be transported to the door of the ship. There are several of these small platforms here, but only one performs this function. Enter the ship and follow the hallways to Kushulai'n's throne room. Approach the hero and engage him in conversation. He truly believes that you are the Nomad Soul and agrees to give you the sword Barkaya'l. He dies in front of you. Go to him and press Action to inhabit his body. Pick up Barkaya'l.Descend from the throne and look for five Magic Rings behind it. Go through the green-lit teleportation doors behind the throne to meet Astaroth face-to-face.


Part Ten: The Heart of the Matter

Kill Astaroth


Walk along a lengthy lava bridge. Eventually, you'll come to a staircase. Go up to a small room and find a black door and a set of Rings. Pass through the door to Astaroth's lair. There you see the gigantic demon, Prince of Darkness, lashed by six electric tethers to the heart of the computer Ix. They are, it seems, one and the same being. After a lengthy and shocking exchange, the shooting sequence begins. Your basic goal is to stay behind Astaroth and blast at a small oval spot in his back. This is his Achilles' heel.First, you must release him from his bonds. This not only gives you access to his back but also severs his control over Omikron. Each tether is controlled by a crystal somewhere in the room. Shooting these will free Astaroth. Immediately about-face and run to the far end of the room to find cover. Astaroth's bolts track extremely well and are nearly impossible to avoid. As you turn around, you should see the first crystal above you. Fire on it to destroy it.

Advancing toward Astaroth, but staying behind the corkscrew-shaped pillar in the center of the room, you should be able to see four of the remaining five crystals. Destroy them from the safety of this point. The last crystal demands that you attack it while in Astaroth's line of fire. Sprint to the south side of the room in front of the beast and face northwest to see the last crystal. Run toward it, firing until it explodes. Immediately take cover.Now you will want to stay in the middle of the room at all times, circle-strafing around the now-free Astaroth. Fire first at Astaroth's head. When you see him stand erect and start to twitch, you'll know he is temporarily immobilised. Circle around Astaroth's back and fire into the bluish oval between his shoulder blades. His body will react with a red flash and you'll see his health bar drop. Astaroth has three basic attacks. His standard energy bolt comes when you are at medium-to-long range. It tracks relentlessly but moves slowly; wait until he fires and move laterally to avoid it. Second, if you venture into medium-to-short range, his chest opens, releasing a plume of fire. This can only be avoided by retreating backward and laterally. Third, Astaroth will jump into the air and stomp on your head. When you've drained all of Astaroth's health, he falls to the ground. You'll plunge Barkaya'l into Astaroth's back. Sit back and watch as your quest draws to its joyous ending. Omikron is free and you are returned to our world.


CLICK HERE
TO CLOSE WINDOW


Created: Jan. 2001 © Paul Kinder Last Updated: 24/11/02